Your basket is currently empty!
Introduction to Sass
In a previous post, I’ve introduced using Sass through the WordPress Customiser and Jetpack. In this post, I want to quickly explain what exactly Sass is and where to get started.
Sass stands for “Syntactically awesome style sheets”, and is basically CSS with superpowers — or “CSS on crystal meth” as I described it in one of my more dark moments. The best way to explain what those superpowers are is to show it.
Variables
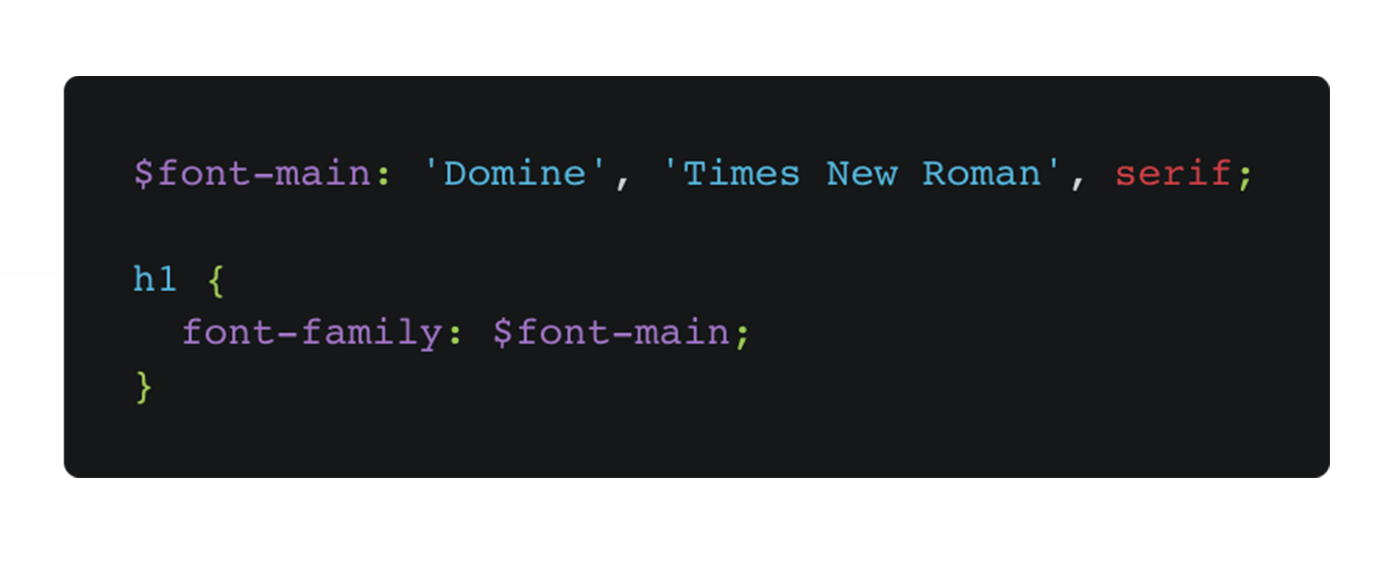
The main green I use on my own website, currently has a HEX value of #78bf1a. With CSS, I would have to mention that value every time I want to use it.
That’s not the case with Sass. With Sass, I can define any value that I’m expecting to reuse beforehand, so I don’t have to repeat myself. The very nice thing is that whenever I plan to update my theme colours, I can just update it once where the variables are defined.
In it’s simplest form, variables are defined as $variable: value;. For a color that would be $colour-primary: #78bf1a;, but you can use this for anything that is repeated. The below example is one for fonts and shows how to call the value.

Nesting
A next major thing is that with Sass, you can follow the structure of your HTML by calling selectors within selectors. So while you’d have to target h1, h1 a and h1 a:hover separately in CSS to define their values, you can do that all in one go, as demonstrated below.

Mixins
A next step would be to look at mixins. A mixin is a group of CSS declarations that you want to reuse throughout your website. You’d define the mixins at the top of your stylesheet starting with @mixin name where “name” can be replaced by anything that’s meaningful. To use it for the selectors, you use @include name to use the mixin, this will apply the mixin with the name “name” to the selector you’re using.
In both the examples below, the Sass looks longer than the original CSS, but that’s because we’re only showing the mixin applied to a single selector. The strength of mixins is that you can reuse and reapply them on as many selectors.
For example, media queries are mostly written at the bottom of the CSS style sheet, but with Sass you can make it contextual and set the variations for your different queries within your selectors rather than splitting them up.

Another example would apply to not repeating browser compatibility issues with CSS. Instead of defining a -webkit and -moz for each time you use border-radius, you define it beforehand so you don’t have to repeat it.

In the example above, we’ve also already defined the value of the border-radius, but if you leave that open, you can just set that value within the selector if you’re planning to have different radiuses on different selectors. So then you’d delete the : 2em to get @mixin border-radius ( $value ) and set the value in the selector to @include border-radius (50%);. Also, note that you don’t need to use the name “border-radius” for the mixin.
Functions
A last thing I want to show in this introduction are the built-in Sass functions. In many cases, these don’t really have an equivalent in CSS.
For example, one of the functions is lighten(#000, 10%) where you first set a colour and then make it 10% lighter. This is great if you’re using a clear brand colour and you want to use different accents of that colour for the rest of the website’s styling.
This is not the same as opacity. With opacity, it defines the level to which you can see what is behind through it, while this just changes the actual colour. You could combine the two by for example using rgba( lighten(#000,10%), 20% ) where the colour is 10% lighter than black, and there’s an opacity of 20%.

A list of available Sass-functions can be found here.
Next steps
When you get started with Sass, I’d suggest following the order of this tutorial. Start with variables before you move on. The first six months I used Sass, I only used it for variables and not having to go through my whole stylesheet just to change the colour of my branding; with Sass I update it at one place and the whole site adopts that colour.
But this is just an introduction. Sass is open source and has an active community. Just searching for other cool Sass tweaks, will give you a wide array of options. For example, have a look at the @extend options, or operators.
Resources
This blog post is a summary of a workshop I gave together with Gareth at WordCamp Cape Town 2017, called “Sass to the reCSSue”. You can first find some other resources and then our slides below that.
- DRY-ing Sass mixins
- Some good mixin lists:
- Gareth’s GitHub repo (CSS & Sass)
Comments
2 responses to “Introduction to Sass”
-
I finally got around to playing with this a bit over the weekend. Took some getting used to, but it’s so much easier than regular CSS!
-
[…] Finally, I wanted to try a few new things with Sass. I’ve been a big fan since I did some courses in CSS and its advanced version, Sass (I took those courses on Treehouse by the way). Last year, at WordCamp Cape Town, I even gave an introduction to Sass. […]
Leave a Reply